Windows games on Android
Introduction
I recently bought myself a new gaming handheld. After long waiting and struggling I decided to buy the faboulus mid-range device Retroid Pocket Flip 2. I don’t have any other device to test or compare settings or tweaks I found out and describe in this article. Please keep that in mind.
Technical details:
| Part | Value |
|---|---|
| CPU | Qualcomm Snapdragon 865 |
| Cores | 1x A77@2.8G; 3x A77@2.4G; 4x A55@1.8G |
| Arch | arm64 |
| RAM | 8 GB LPDDR4x@2133MHz |
| GPU | Adreno 650 |
| Int. Storage | 128 GB |
| Display | 5.5” AMOLED, 1080p@60fps |
Important notice
It is important for you to understand that the entire subject area is highly experimental. So therefor using an android gaming handheld as daily driver for playing windows games shouldn’t be your first goal. It’s more like a nerdy tech thing and a prove of concept. As with everything in life it is all a “hit & miss” or “trail & error”. Don’t give up to fast! The developers behind all mentioned projects are doing a very great job! Progress guranteed!
Recommended prerequisites
I encourage you to download the following additional software or drivers and bookmark their sources. You’ll need them every now and then.
Adreno GPU drivers (Snapdragon only)
- AdrenoToolsDrivers: This is an approach for downloading K11MCH1’s GPU drivers with automatic detection of which is the best for your chipset. Source: https://github.com/K11MCH1/AdrenoToolsDrivers/releases/tag/fetcher_v1.2
- Mesa Turnip driver v24.3.0 - Revision 9v2: I suggest this driver as best one for all cases, like Winlator cmod or Eden Source: https://github.com/K11MCH1/AdrenoToolsDrivers/releases/tag/v24.3.0_r9
- turnip_mrpurple-T19-toasted.adpkg: This is the driver automatically choosed by AdrenoToolsDrivers. I think it is not as good as the above because of artifacts and graphic glitches every now and then. Source: https://github.com/MrPurple666/purple-turnip/releases/tag/vturnip_mrpurple-T19-toasted.adpkg
I for myself search through the release pages in GitHub with the keywords: 650, 6xx, A650 or A6xx. ;-)
Windows emulators
- Winlator by BrunoSX: This is the ground root of all these amazing projects. Without it any other project wouldn’t be possible without it. Source: https://github.com/brunodev85/winlator
- Winlator Cmod by coffincolors: Best Winlator fork in my opinion. Source: https://github.com/coffincolors/winlator
- GameNative by Utkarsh Dalal: Open Source project to create a native Steam gaming experience. I would try this one before GameHub. Source: https://github.com/utkarshdalal/GameNative
- GameHub by GameSir company: Another Fork of Winlator, but with the goal to create a nearly native Steam gaming experience. Worth a try. It is made by the creators of the GameSir controllers. Source: https://gamehub.xiaoji.com/
Useful sites
- Winlator101 - comprehensive Winlator guide
- Winlator101 - compatibility list with settings by K11MCH1
- EmuReady - combatibility database
- Retroid Pocket Starter Guide by RetroGameCorps
Winlator Cmod
All I describe in this guide is, in any way, useable in the other apps (forks) of Winlator. Latest used version, as at the time of writing this guide, is/was v13.1.1.
Overview
At first Winlator must initialize. Let’s do its thing. 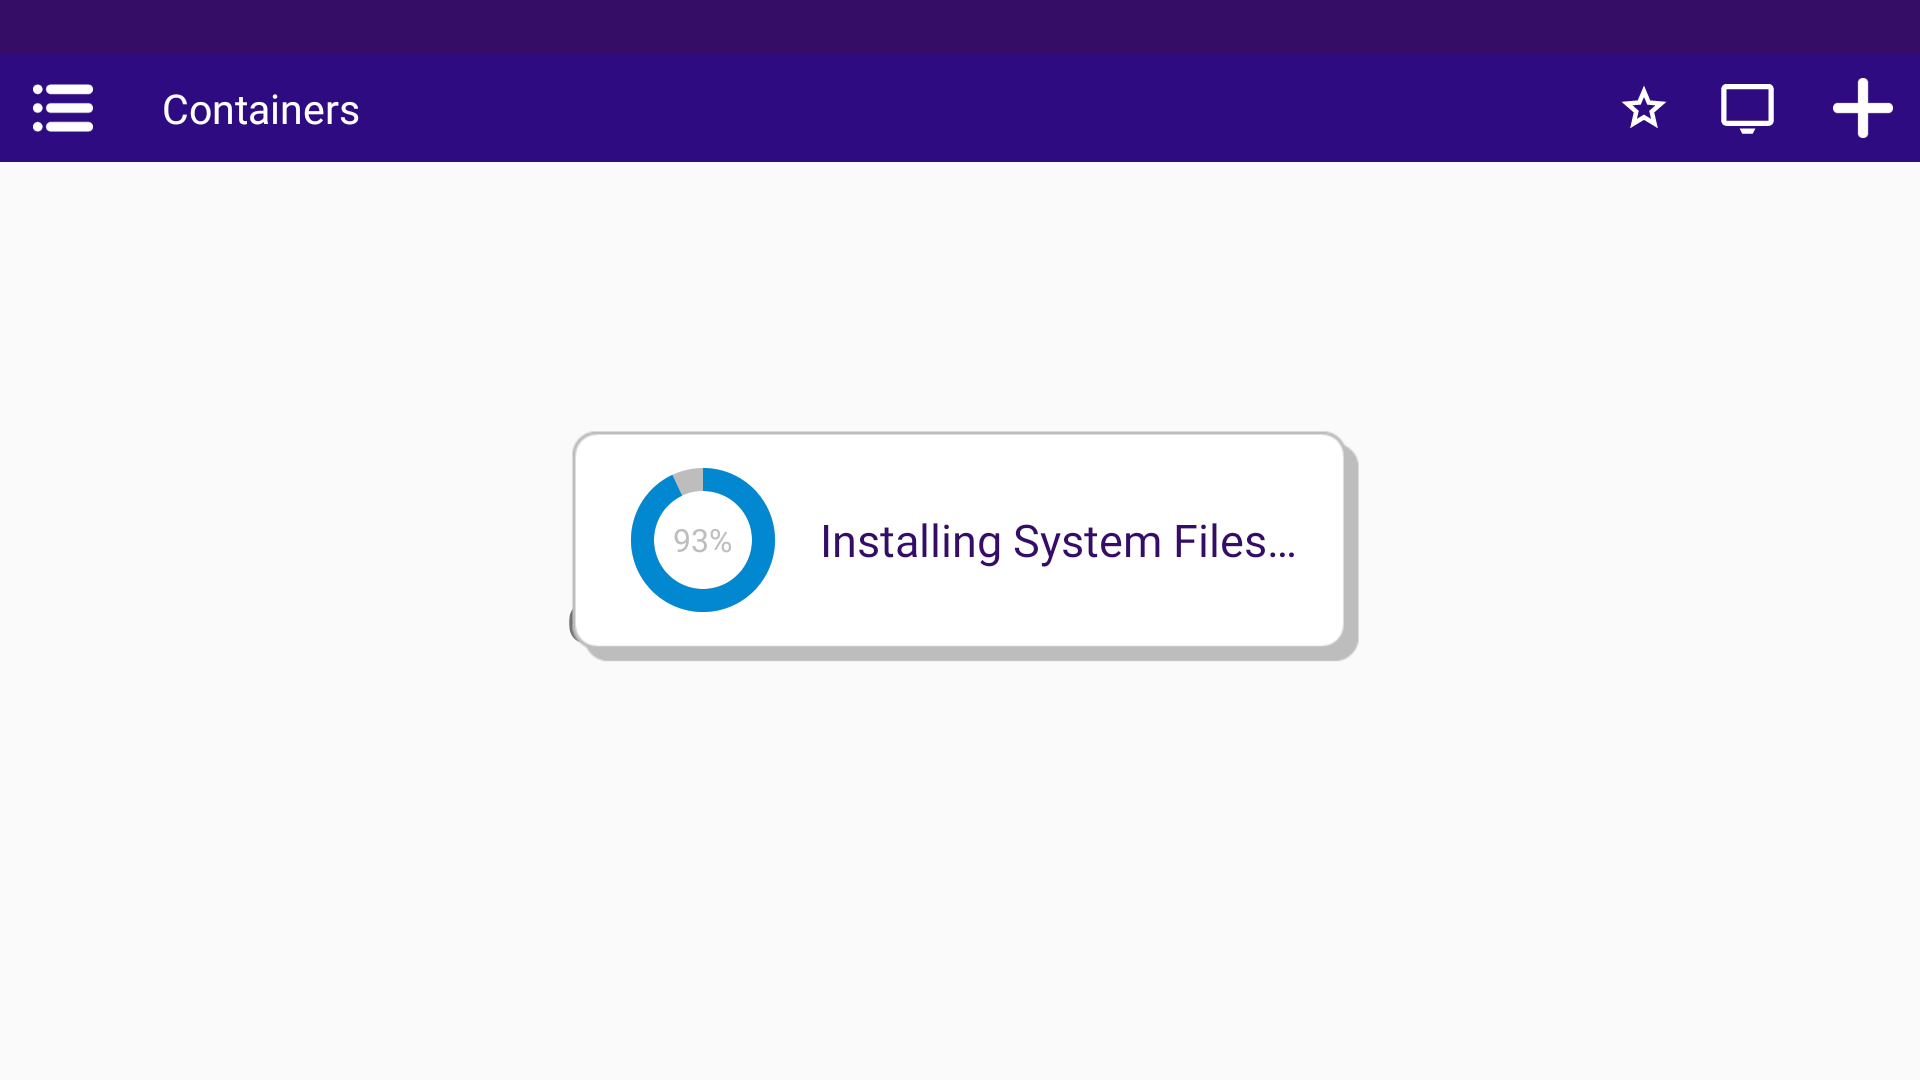
After everything finished the burger menu on top left should be available. Tap it. 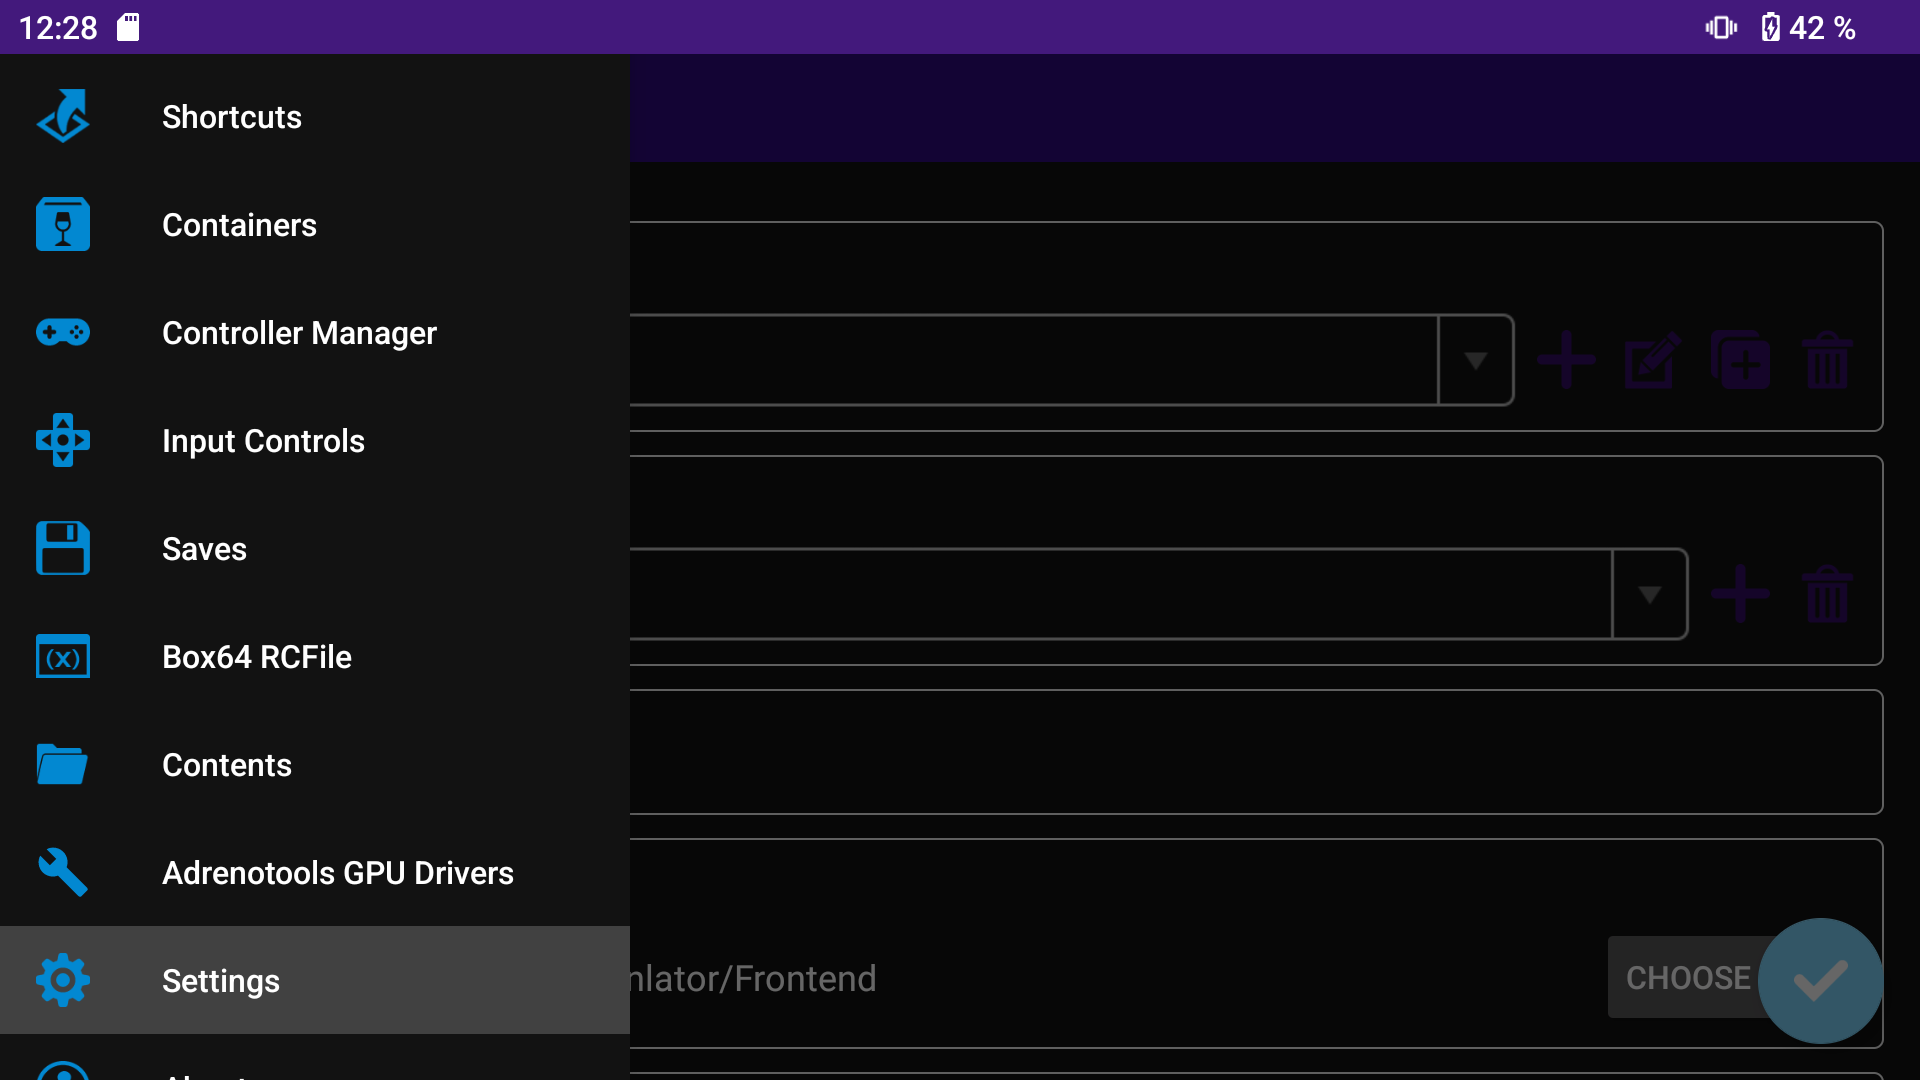
| menu item | description |
|---|---|
| Shortcuts | It is possible to create a Shortcut for each application within a container. This is useful when you have multiple Applications which need different container settings or contoller bindings. It all can be managed with the Shortcuts. |
| Containers | The home of Winlator. Windows container creation. In most situations you just need one container or one per type. (Box64 or Arm64 (FEX)) |
| Controller Manager | Controller magic happens here. You are able to assign the retroid Onboard-controller for automatic detection in Steam. |
| Input Controls | Within this menu you map each Keyboard/Mouse/Gamepad key to a controller button. Useful for games without gamepad support. |
| Saves | More to that later. Not important for now. |
| Box64 RCFile | More to that later. Not important for now. RC files in linux usually load environmental variables and such things. More to that later. The important ones are already on by default. |
| Contents | Here you have the option to load other versions of programs or addons like DXVK, WineD3D and so on. Not important for now. |
| Settings | This is the place of Box 64 presets and other things like dark mode for the application itself. |
Shortcuts
In this section I will add tweaks per game as soon I’ll find out.
Steam
You can install Steam as you would normally on Windows PC. If you use an sdcard set it up in your container as discribed in containers section. Then you don’t have to struggle with managing your Steam settings and library.
| menu | setting | value | description |
|---|---|---|---|
| interface | GPU-Accerlation | off | I noticed a more responsive / reactive interface. |
| interface | News-Window at App-Start | off | Loading this takes time. |
When you edit the shortcut you’ll have the same options as you would configure the container itself. Set the following:
| item | variable | value | description |
|---|---|---|---|
| Advanced | Box64 Preset | Unity / Non-Unity | Select / Set the right preset for the game you want to play. |
| Advanced | Input Controls | Profile-Name | If you created a controller profile select it here. |
| Advanced | Exec Arguments | Box below | If you noticed that Steam wouldn’t start after installation or per shortcut this is a workaround. |
1
-vgui -nocrashmonitor -noshaders -no-shared-textures -cef-single-process -cef-in-process-gpu -cef-disable-sandbox -disable-winh264 -no-cef-sandbox -vrdisable -cef-disable-breakpad -cef-disable-gpu -no-dwrite -no-gameoverlayrenderer -noverifyfiles -nobootstrapupdate -skipinitialbootstrap -norepairfiles -overridepackageurl
Better to copy & paste ^^
NFS Most Wanted Black Edition (2005)
If you want to use Widescreen mods which use a modified dinput8.dll to load the mods you must define that as Environment Variable. This procedure also works with Wine on normal Desktop-PCs.
| variable | value |
|---|---|
| WINEDLLOVERRIDES | dinput8=n,b |
Containers
In this section I’ll try to explain important settings as good as I could. 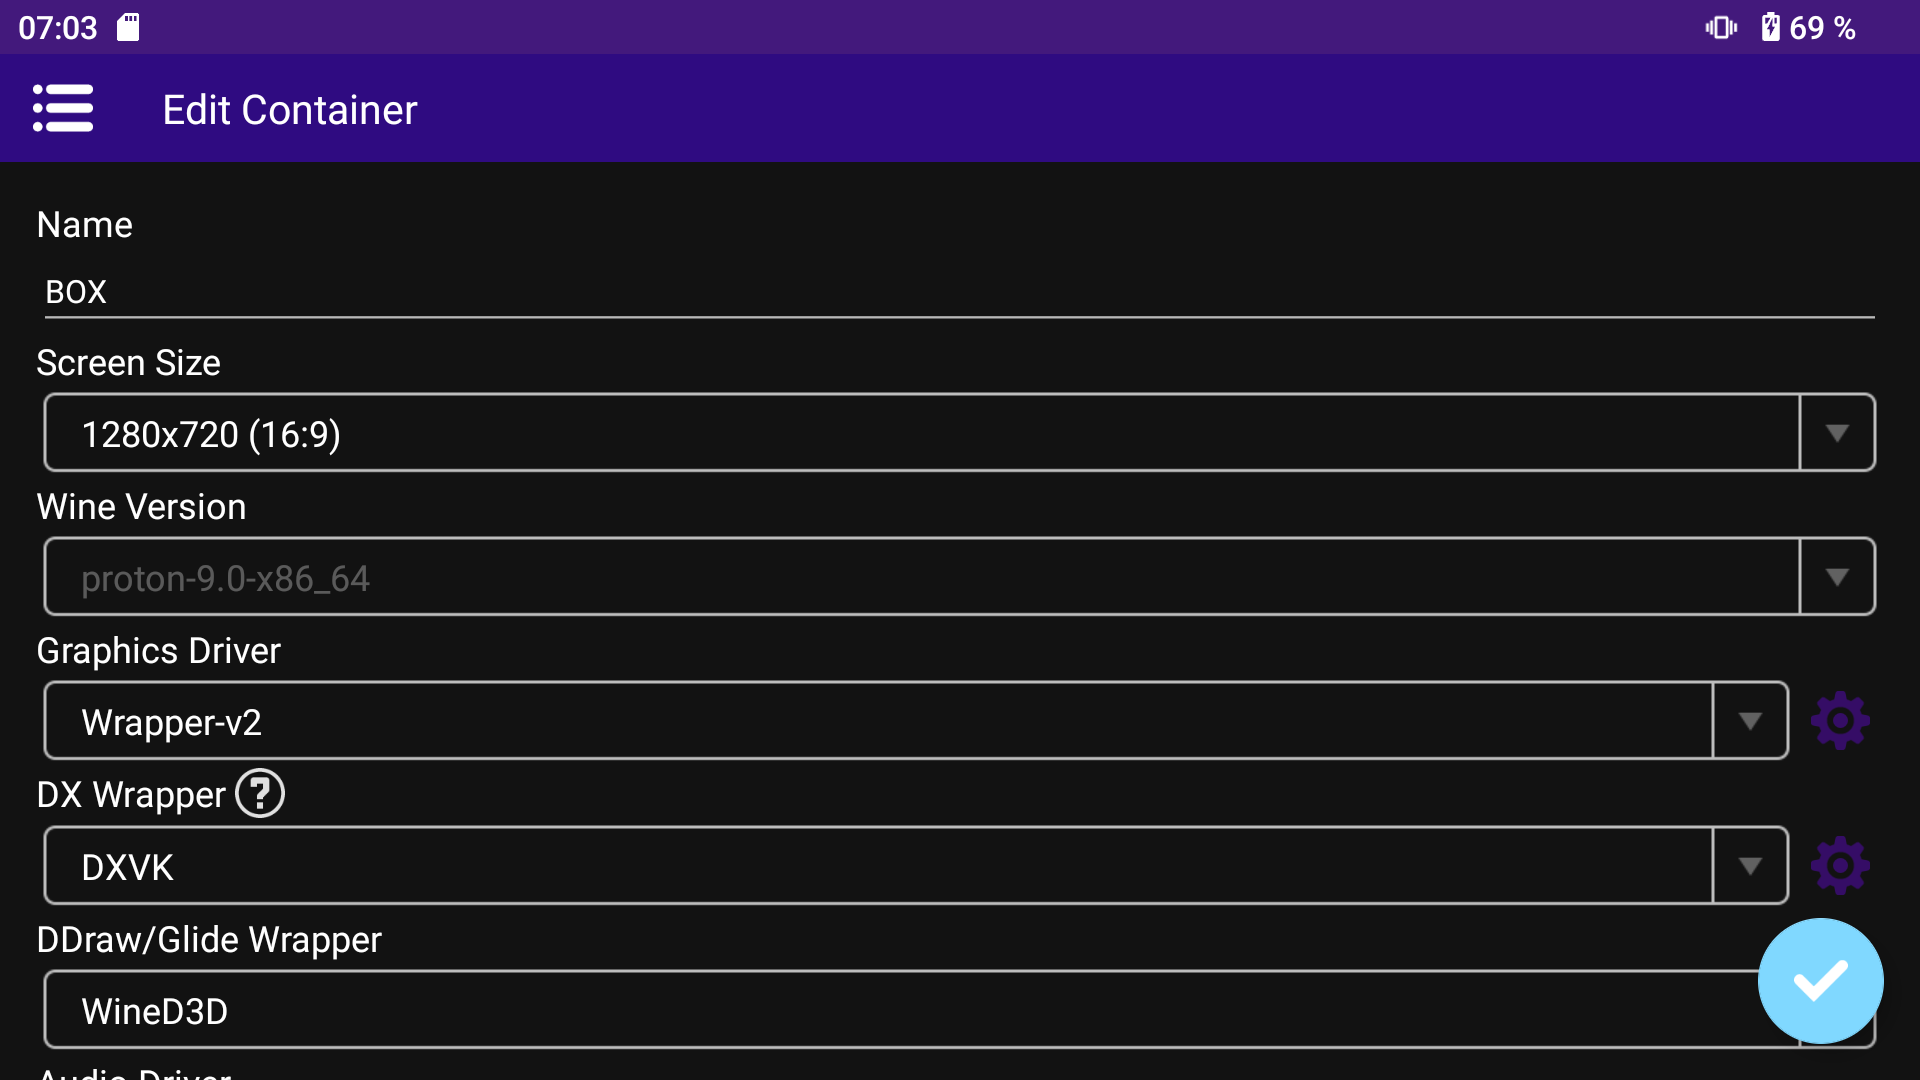 Set your preferred display resolution. I recommend you to leave it at
 1280x720. 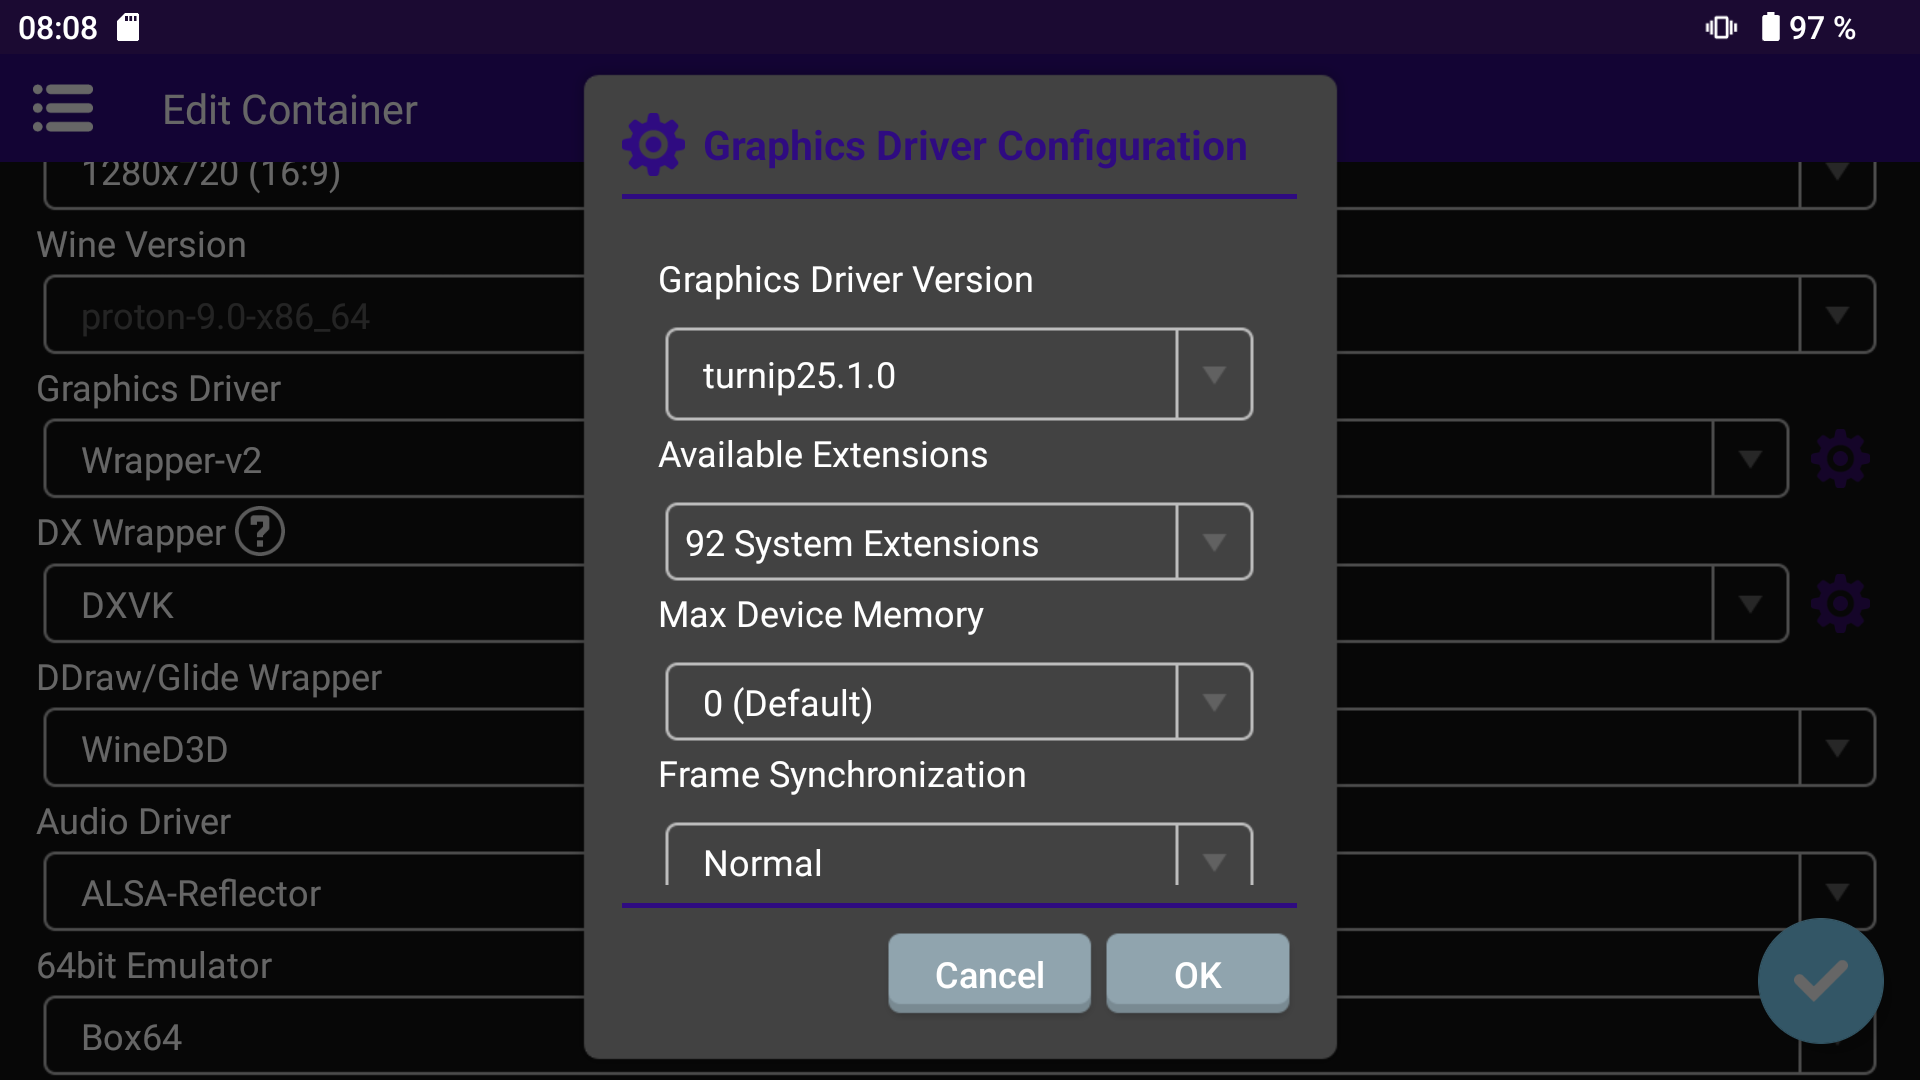
GPU driver
You can choose between Wrapper and Wrapper-v2. I didn’t notice any differences between those, but next to it tap on the gear-icon and choose your desired GPU driver. If you have a Snapdragon CPU with Adreno GPU. On any other CPU vendor you must select System. I think the v762 and v805 are for Snapdragon 8 Gen x and Snapdragon 8 Elite. 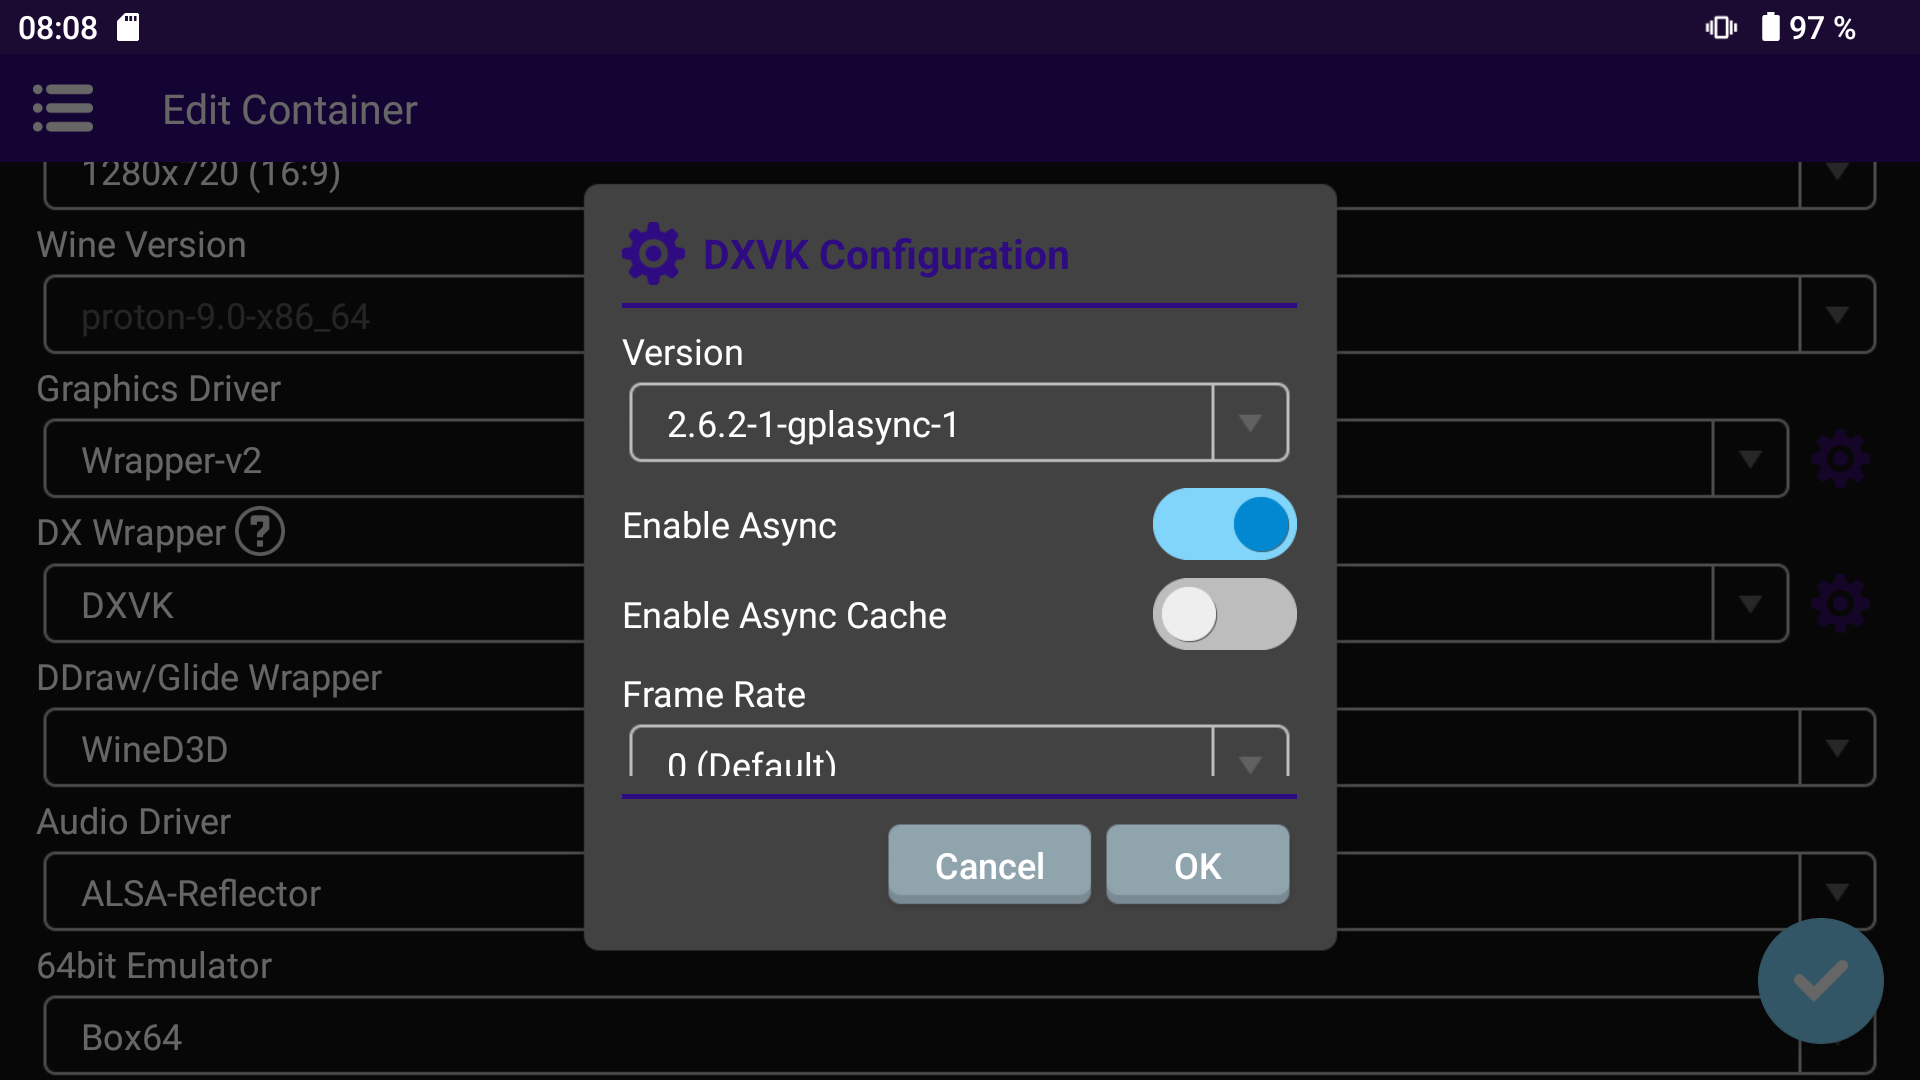 I suggest you to use the latest version available. Beside that the suffix
 gplasync is important. Turn both Async switches on.
Tap on the
questionmark-icon next to DX-Wrapper to get a list with all options and their meanings.
Audio driver
Always use ALSA-Reflector because its preventing that Audio gets broken during gameplay. 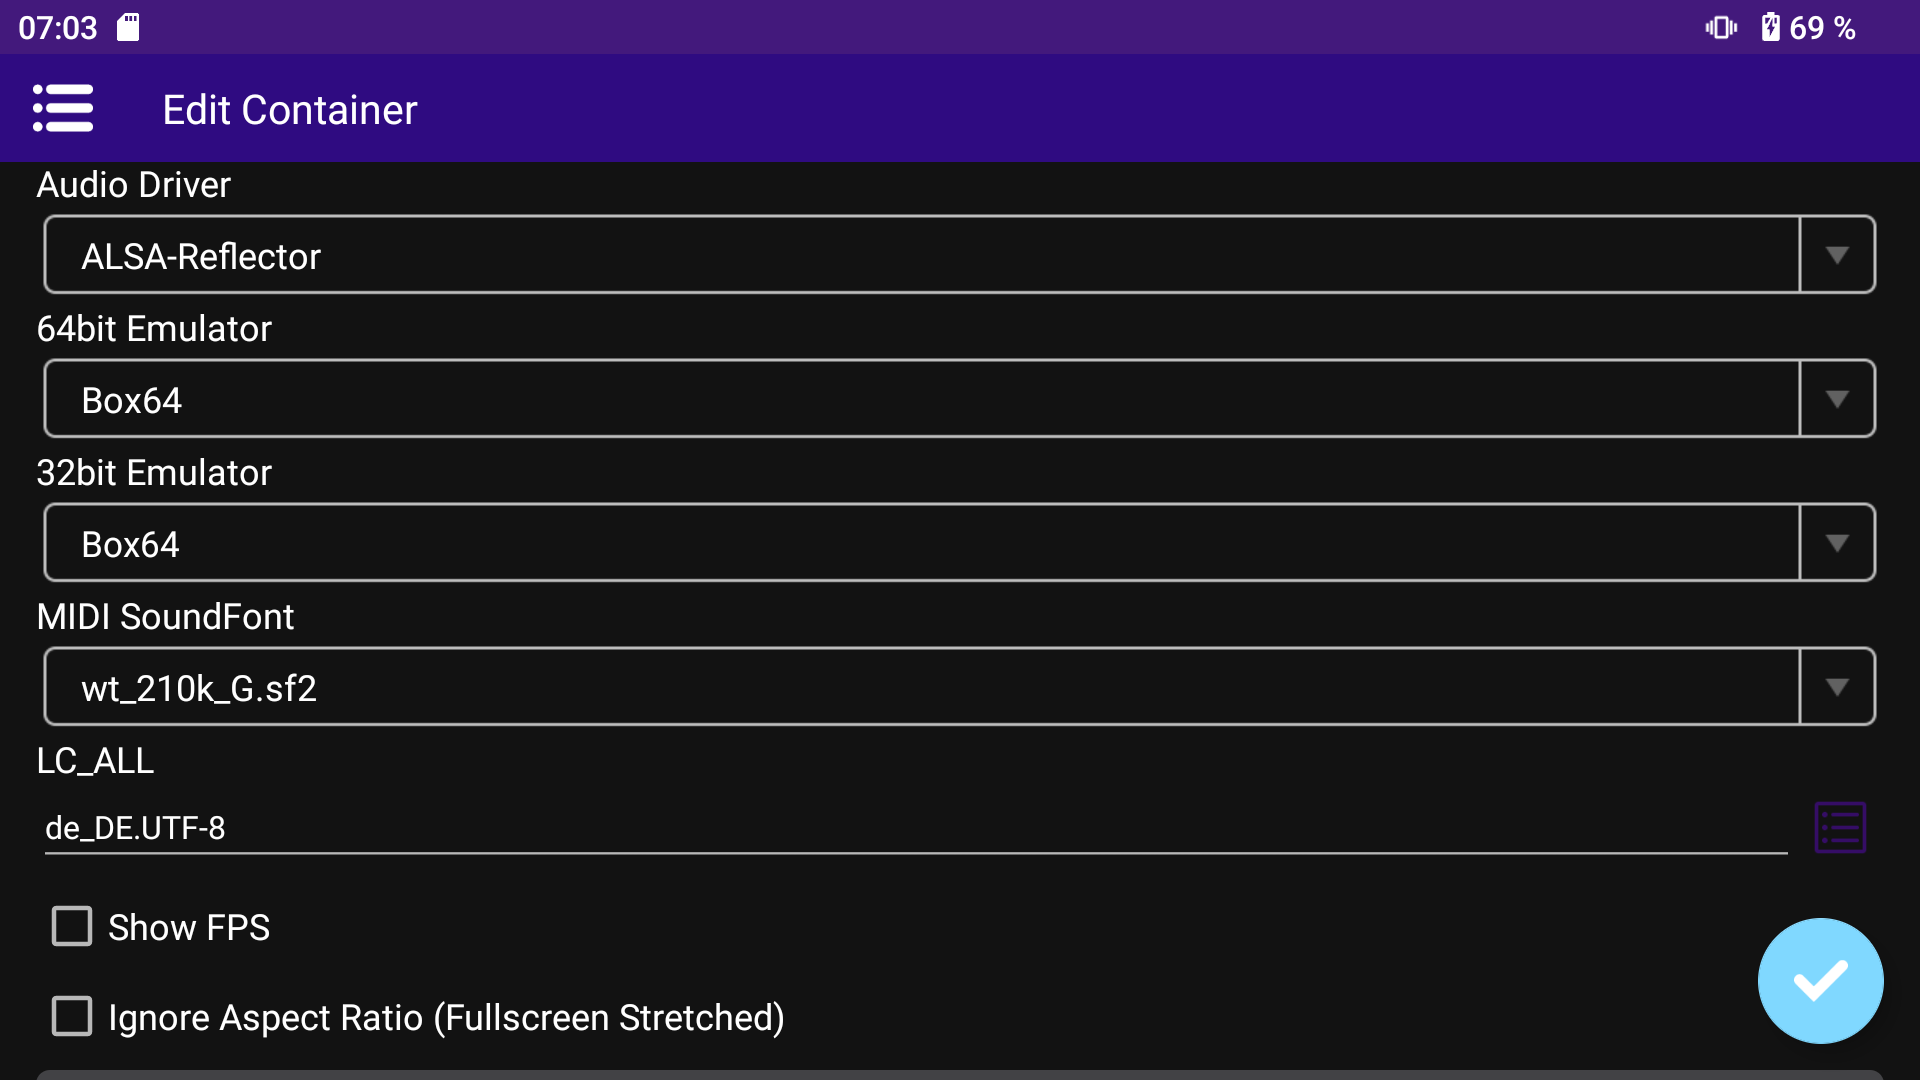 More on that here.
Wine Configuration
 The only things you may adjust are
 Theme and Video Memory Size.
| variable | value | description |
|---|---|---|
| Theme | light | Default value, optional because there are no windows when starting through Shortcuts |
| Renderer | gl | Default value, as for now leave it as it is, because vulkan is broken. The devs are aware of that. |
| Video Memory Size | 2048 | Default value |
Environment Variables
You can leave everything here as is. This is the section when customizing things per Shortcuts. 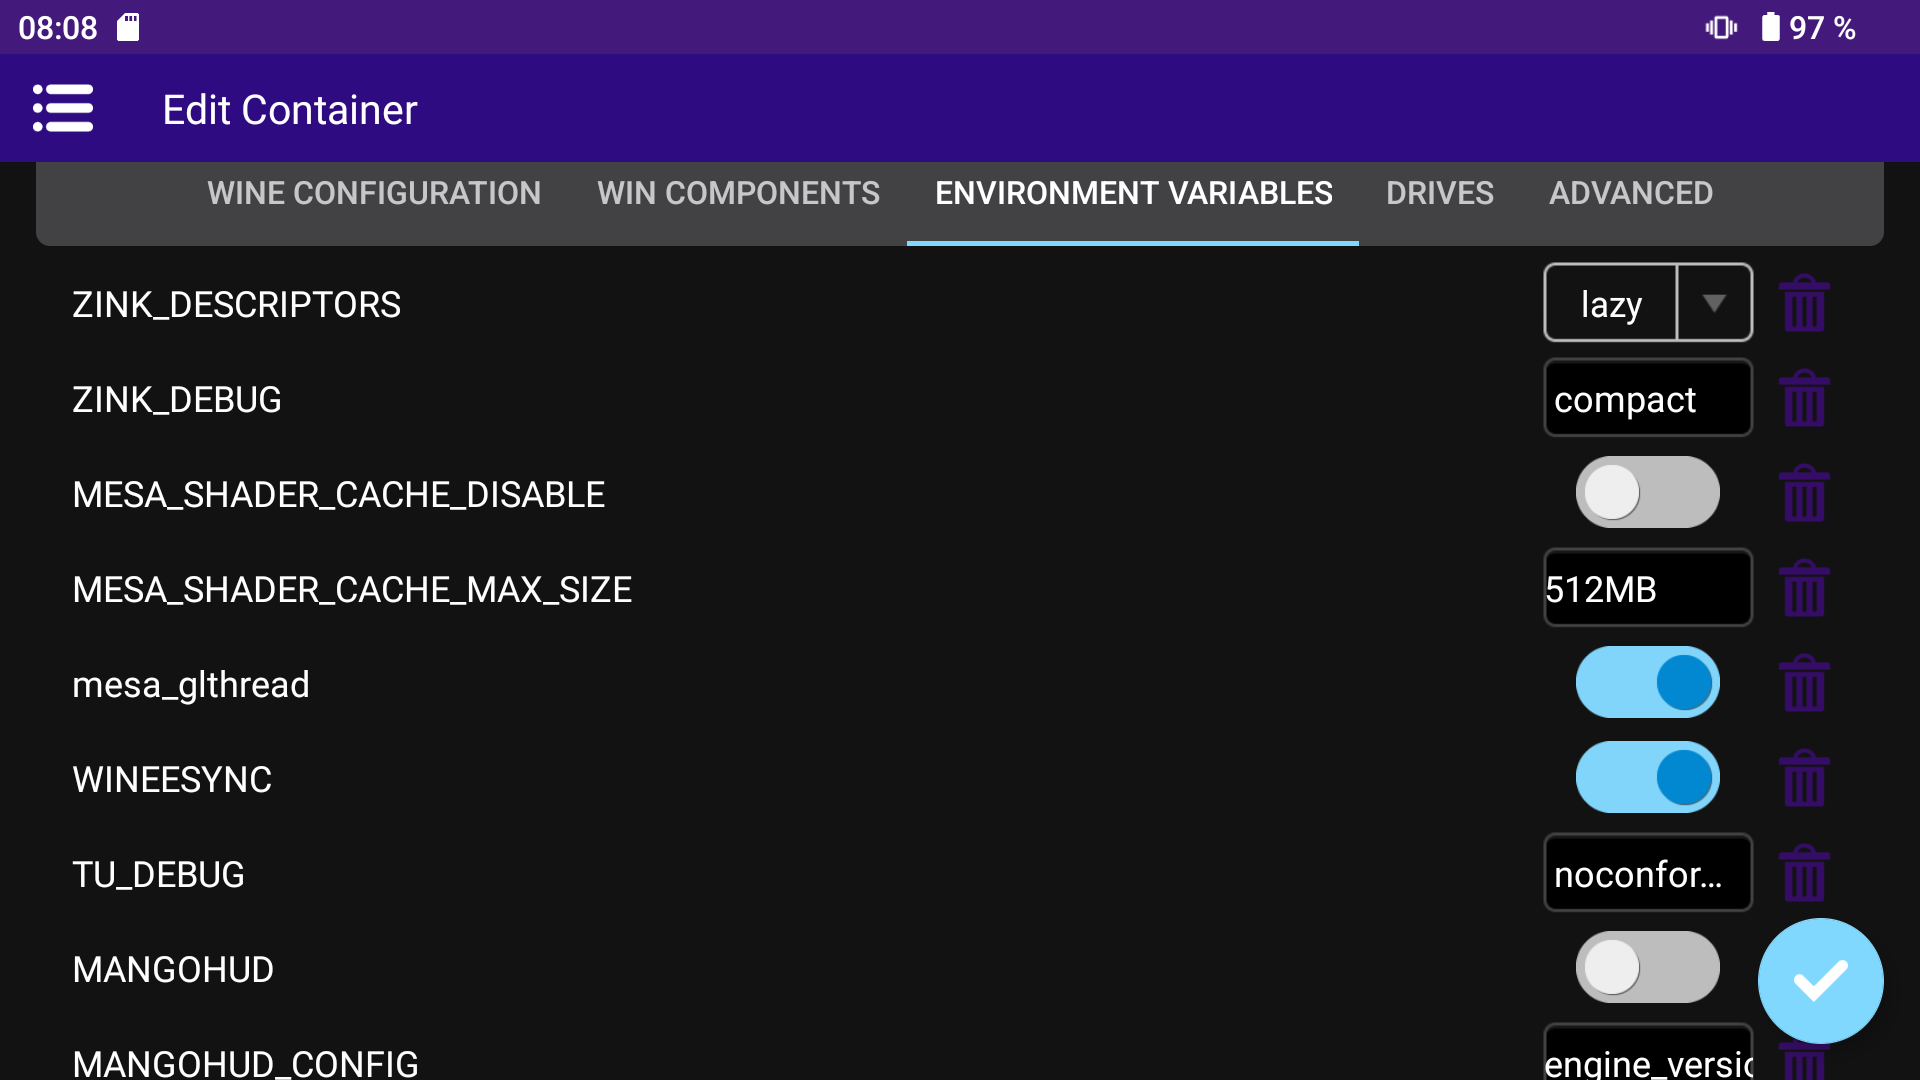
| variable | value | description |
|---|---|---|
| DXVK_HUD | devinfo, fps, frametimes, gpuload, version, api | Default value, you can safely remove it if don’t want a performance monitor displayed permanently. |
| MESA_EXTENSION_MAX_YEAR | 2003 | optional, if older games don’t open try this |
| MANGOHUD | off | default value, if you want you can enable Mangohud. |
Drives
It is recommended to use an sdcard as external storage as well. Therefor you need to add a new mount point and give it the path to the sdcard. Unfortunateley the path is not easy to find with stock apps. 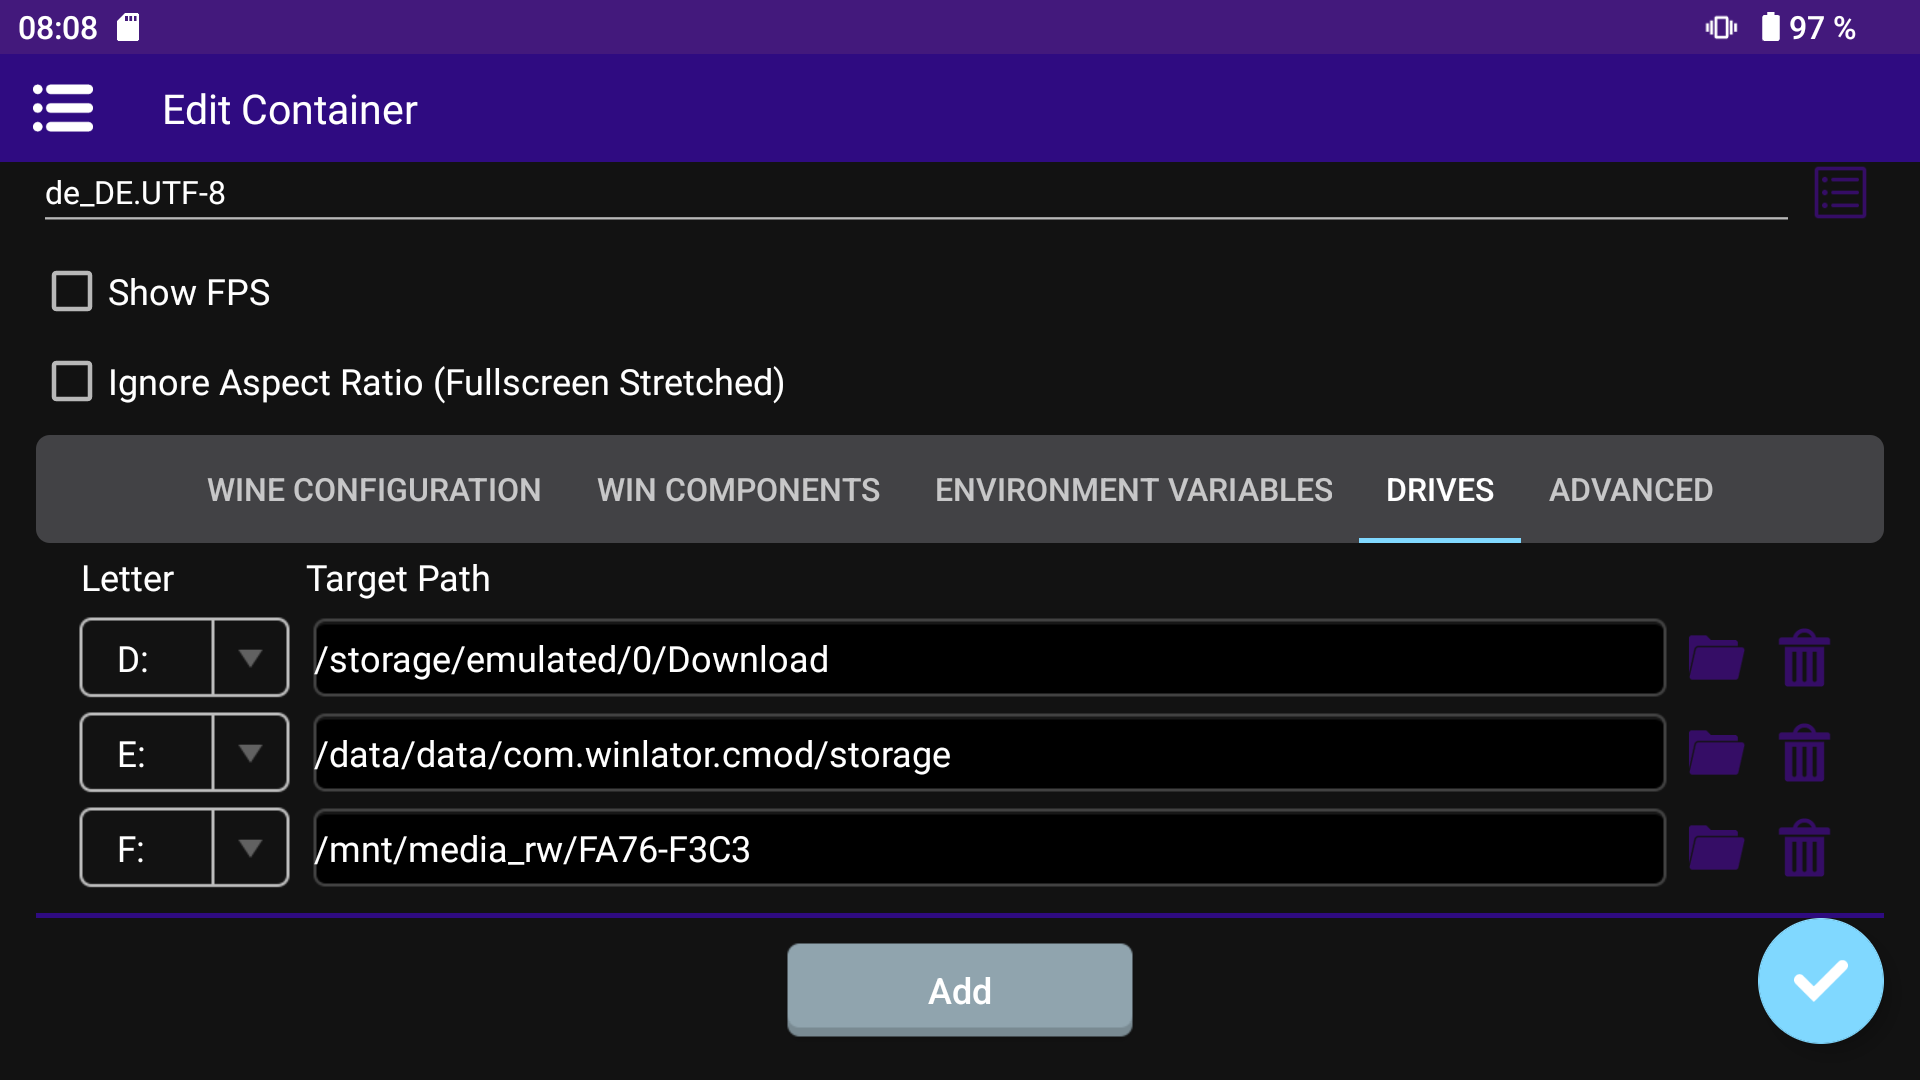 Some file manager from Google Play or F-Droid are able to retrieve the
 ID of sdcard which you’ll need. It should look like in the picture. You can also retrieve it from your PC when inserted or if you use Termux just type df -h in the terminal and copy/paste the path that looks like in the picture above.
Advanced
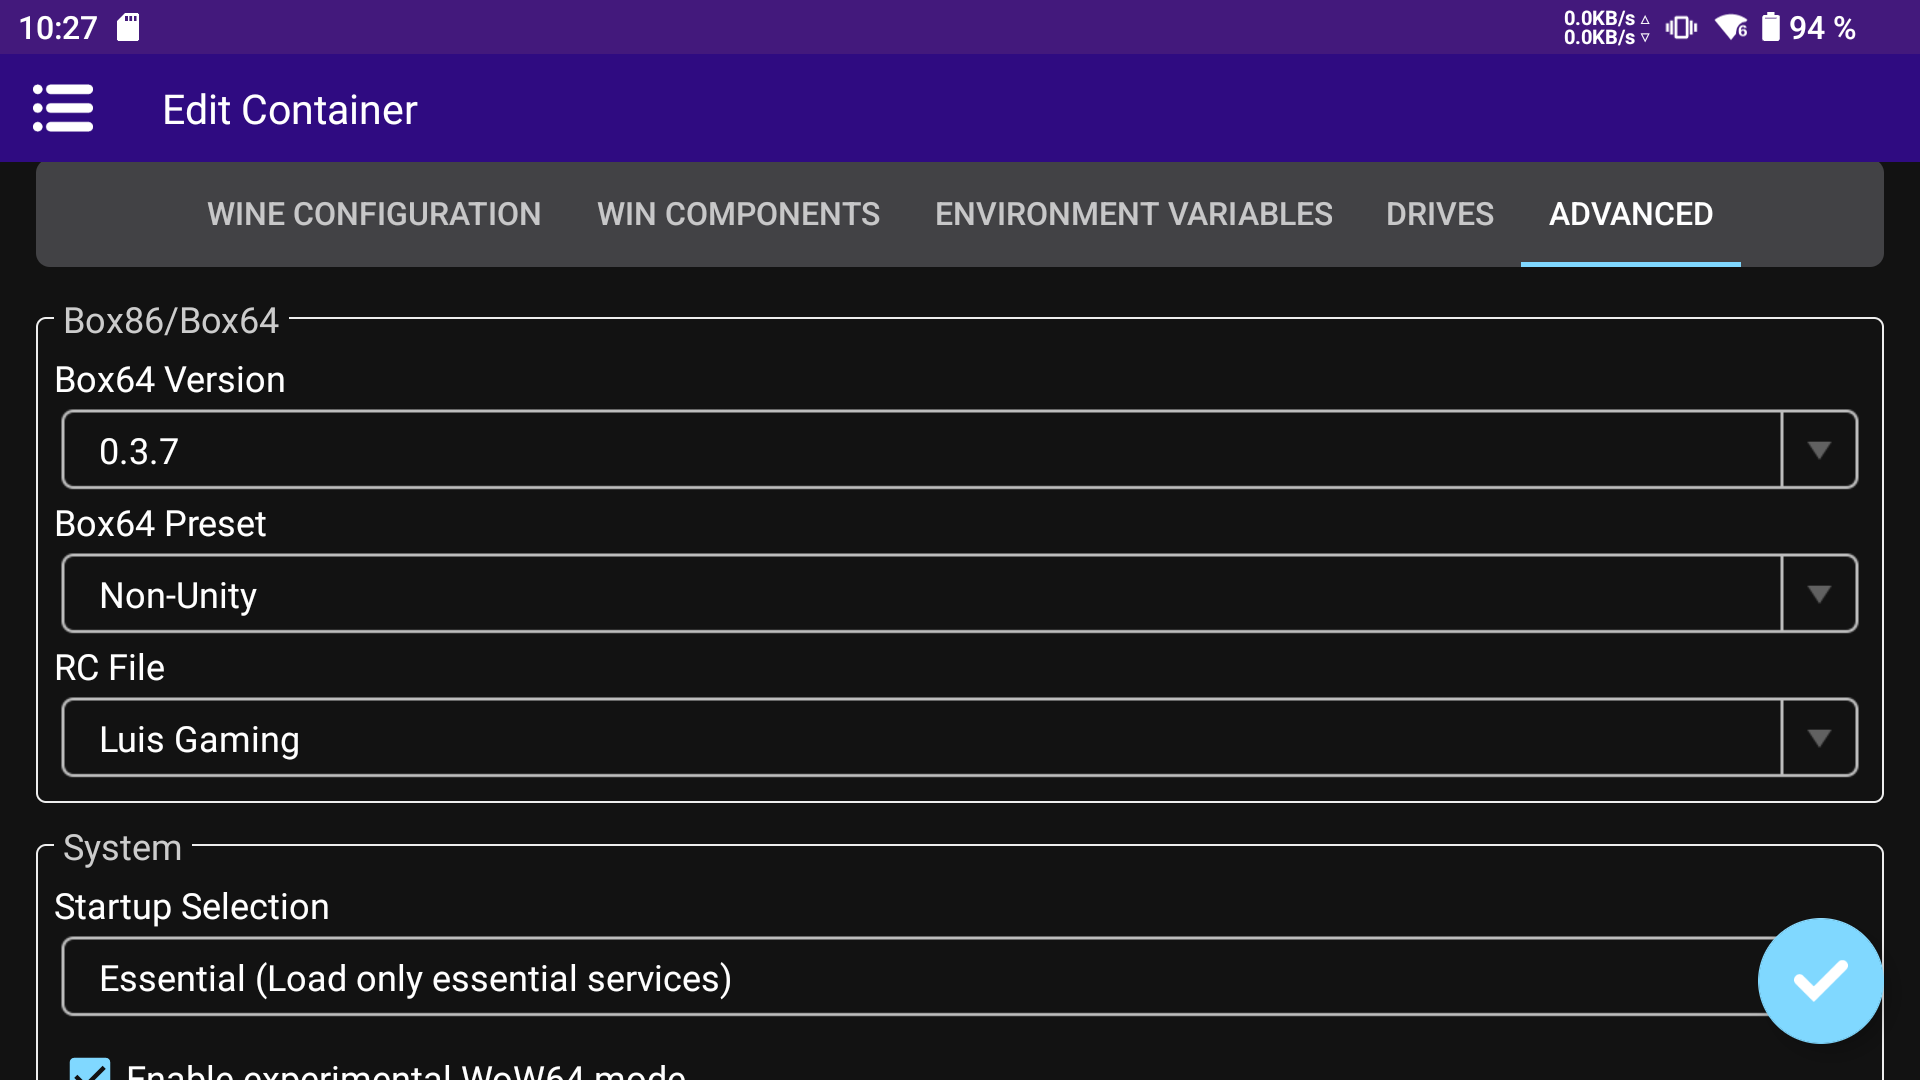 In this section you choose your previously created
 Box64-Preset, the RC file and maybe the Startup Selection.
In
Shortcutssub-menu you have additional options likeInput Controls ProfilesandExec Arguments.
Controller Manager
At first assign the Retroid Pocket controller as Player 1. The result should look something like this. Btw you can also add a second external controller as Player 2. This is great if you use your handheld as console connected to an external display. 
Input Controls
In this sub-menu you can map keybindings and create (and also export) profiles for games/application that don’t have native gamepad support. You can set keybindings by tapping on your controller at the bottom.  This will open another sub-menu were you press each button you want to map and configure it afterwards.
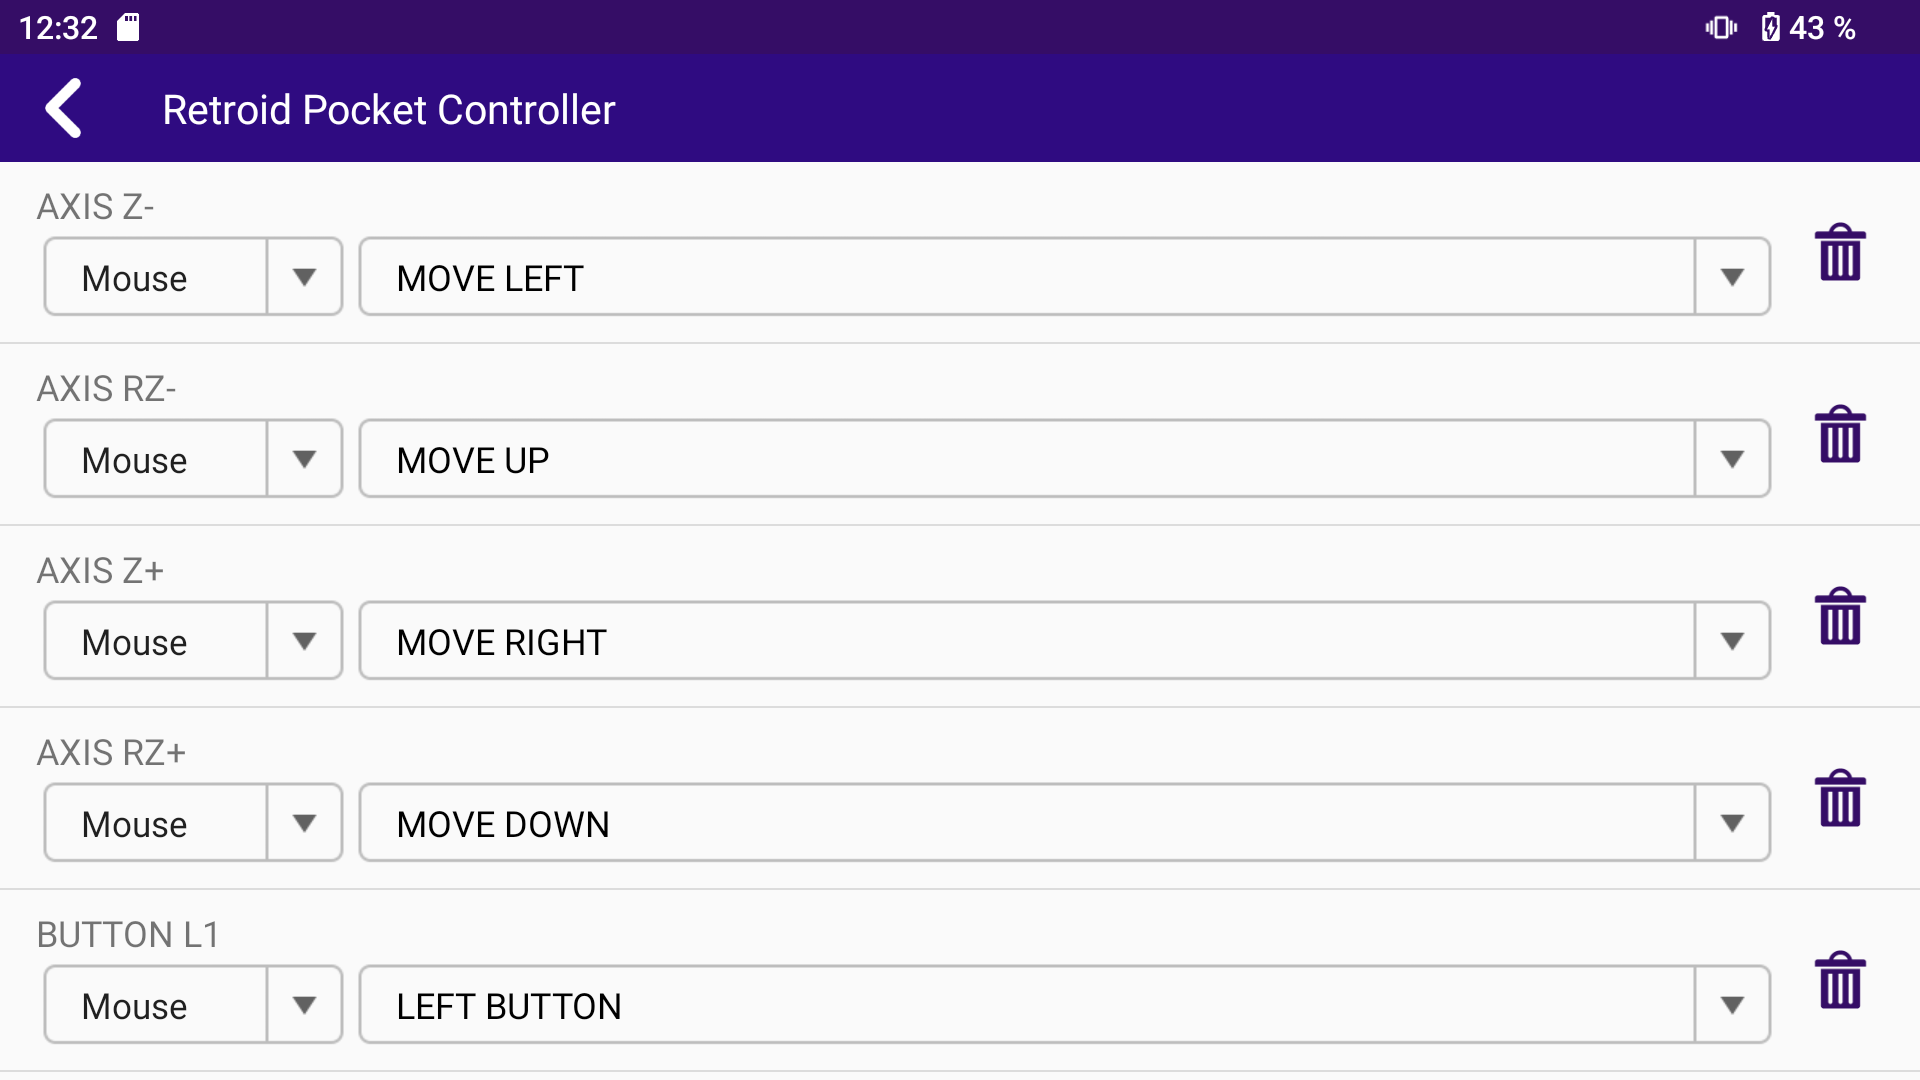
Settings (Box64)
The most important setting here are the Box64 presets. 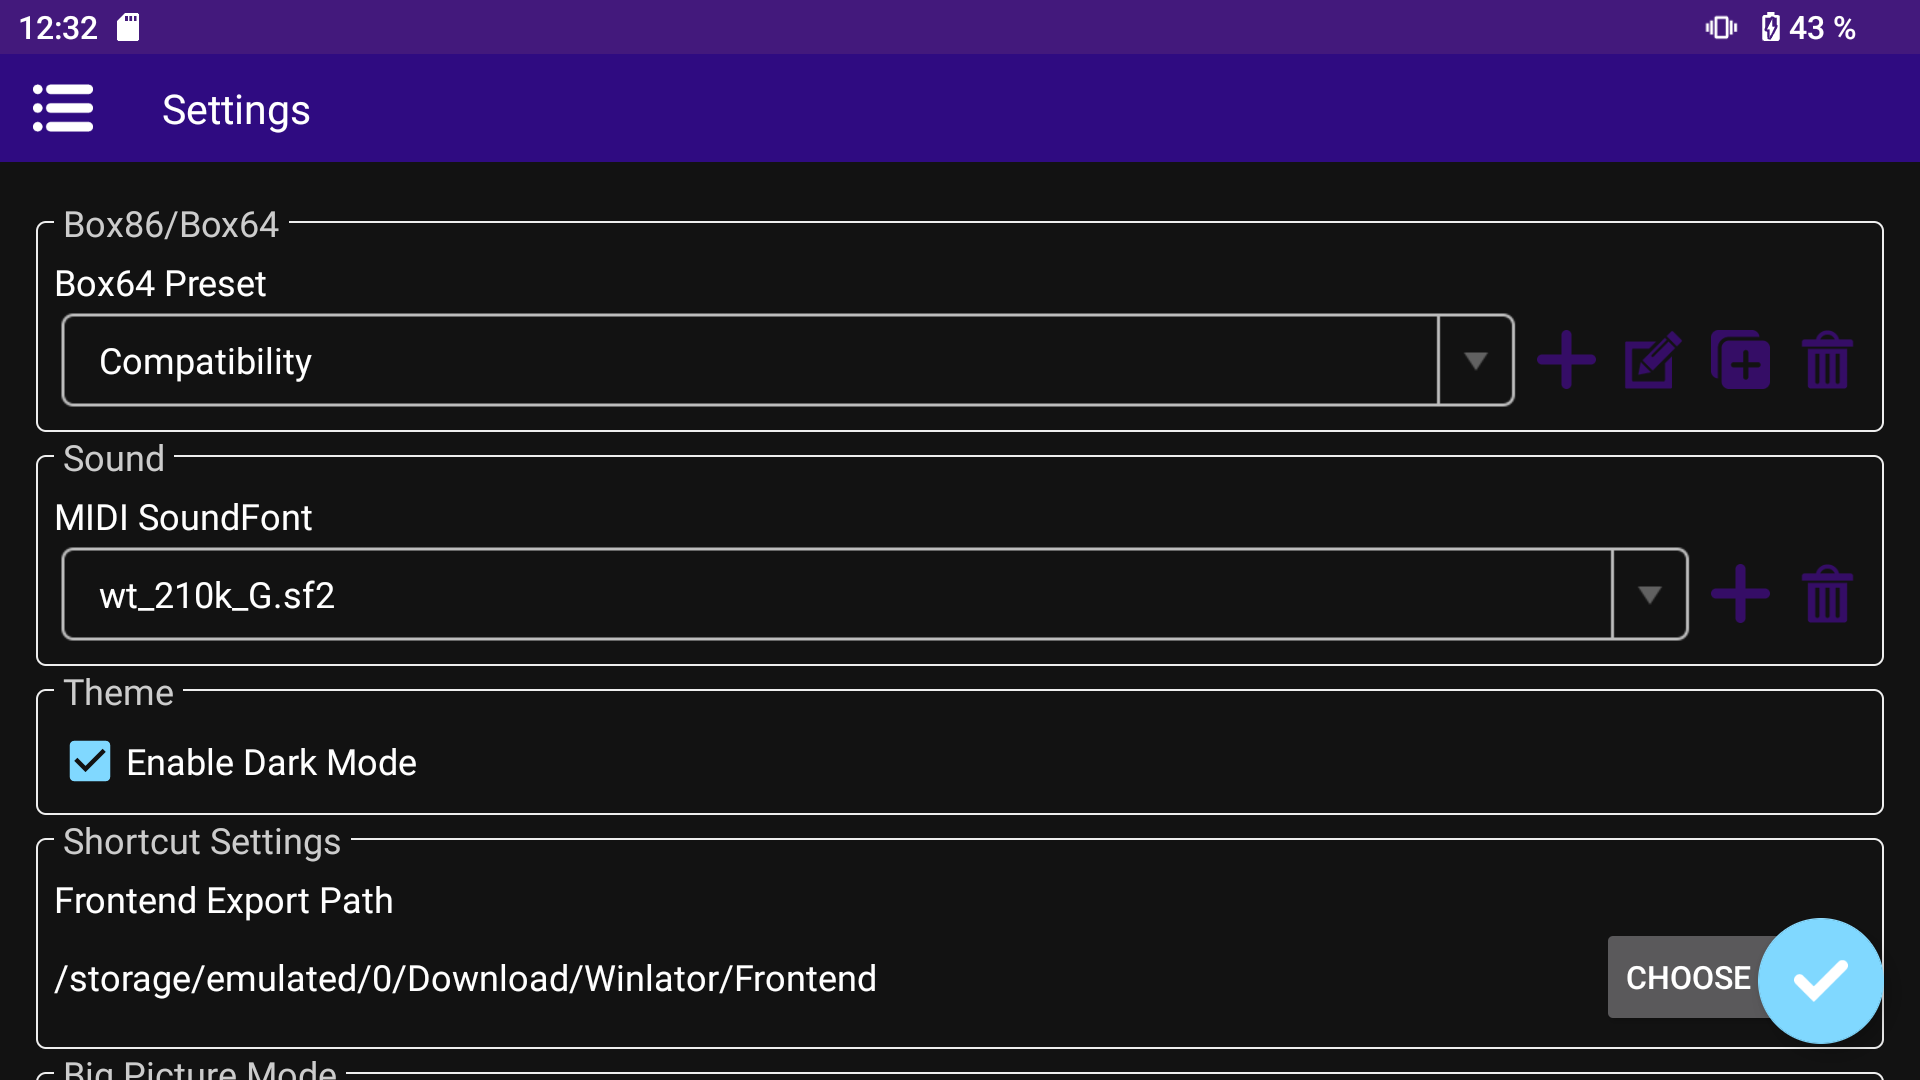
Tap on the +-symbol and create two profiles called Unity (MonoBleedingEdge), Unity (GameAssembly) and Non-Unity. This is significant for running games based on Unity and the rest. You can lookup a short description and possible values in ptitSeb’s Box64 GitHub. The following settings are only the changed ones. You can the leave the rest as default.
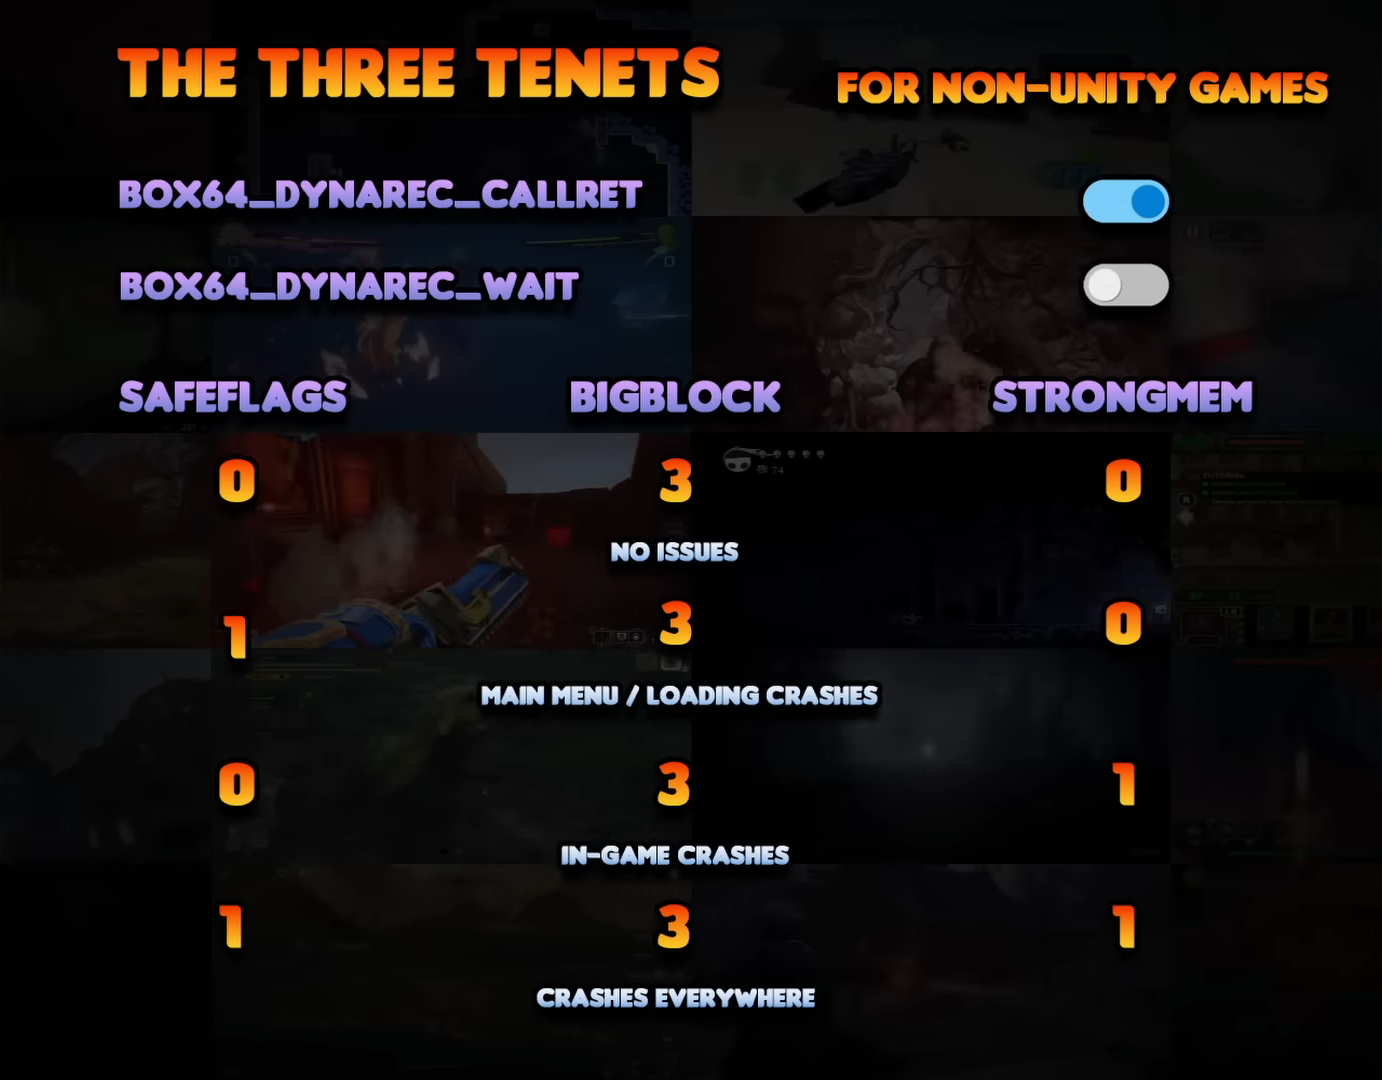
The following pictures are screenshotted from a YouTube video from Zerokimchi
Box64 Unity (MonoBleedingEdge) preset
This preset represents recommended settings if in your Unity-Game folder is a folder named MonoBleedingEdge. 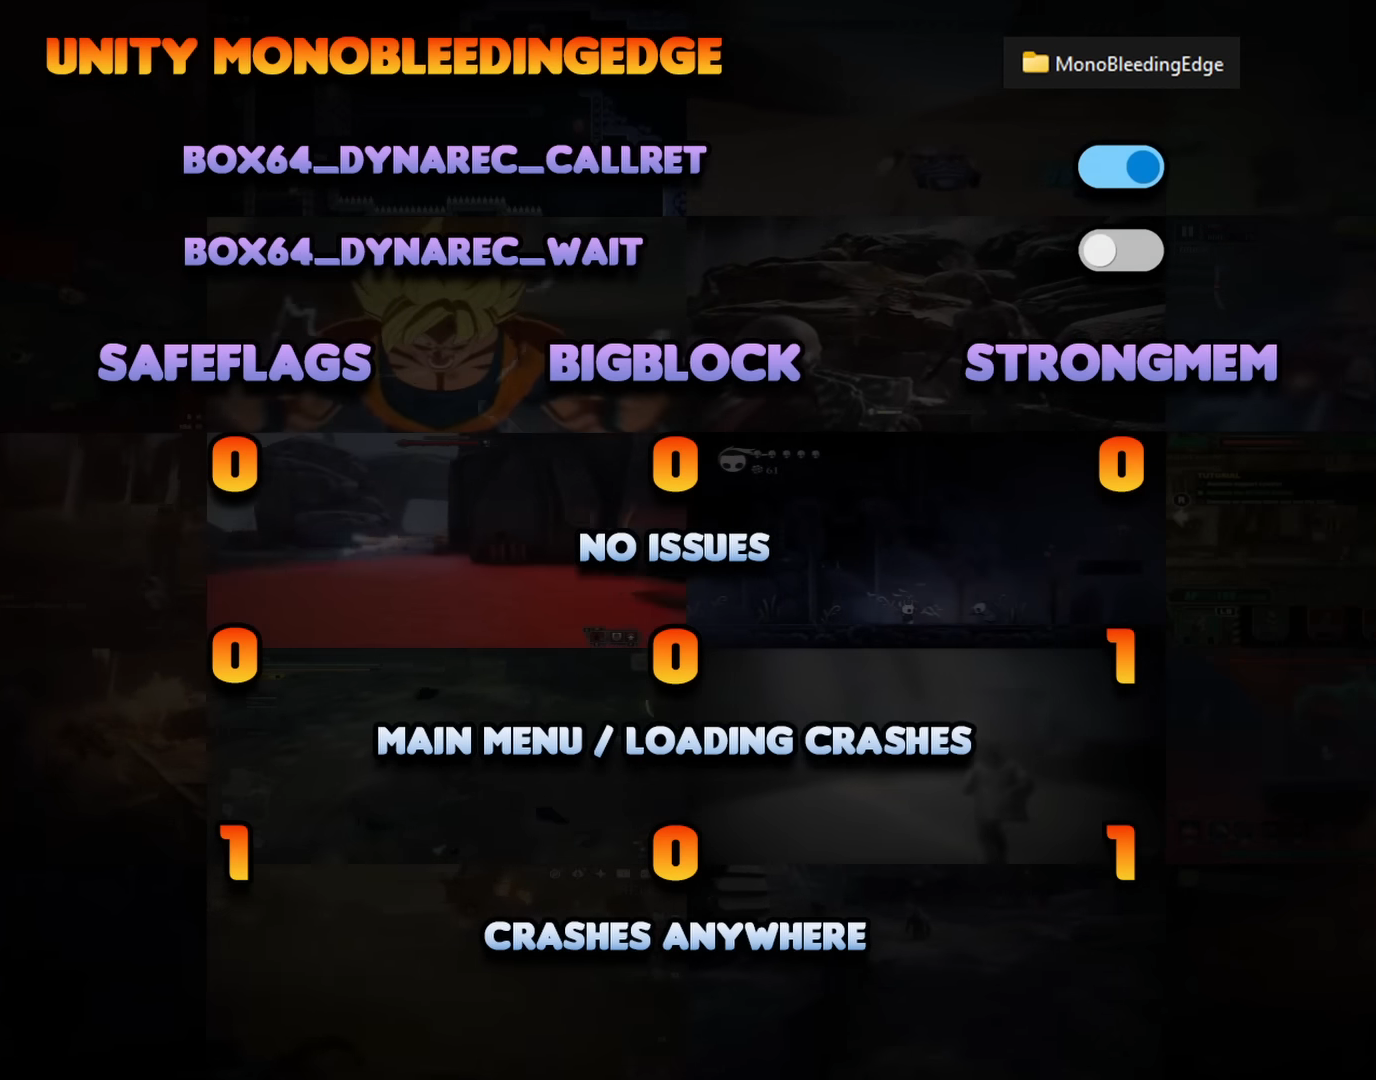
Box64 Unity (GameAssembly.dll) preset
This preset represents recommended settings if in your Unity-Game folder is a file named GameAssembly.dll. 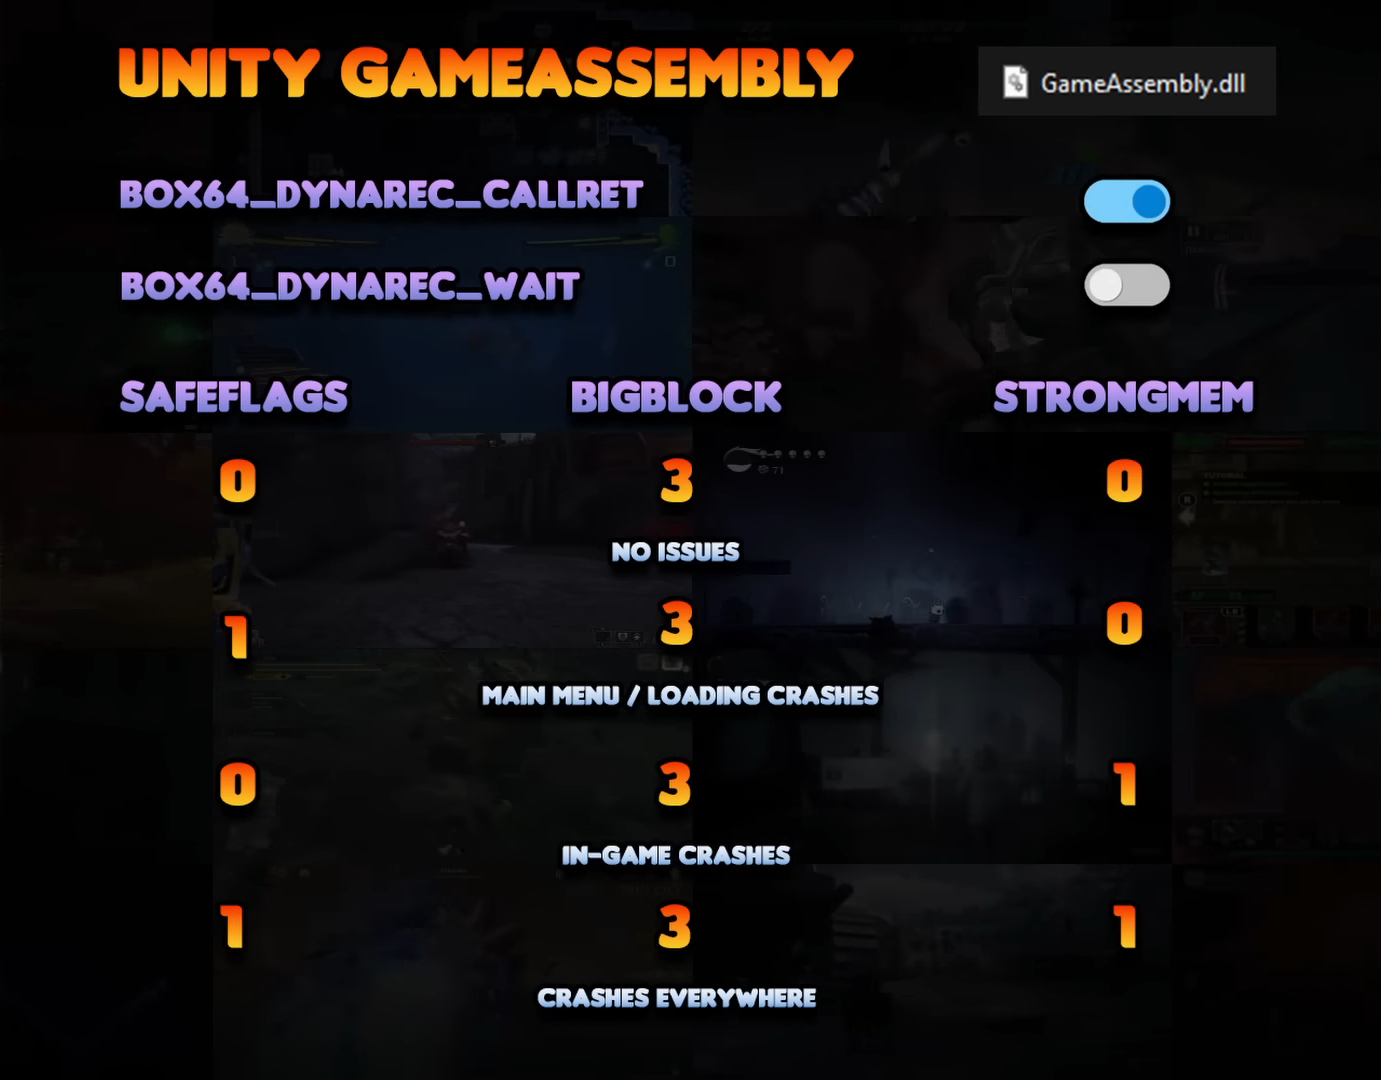
Box64 Non-Unity preset
This preset represents recommended settings for all other non-unity games.