Install & configure QEMU / KVM

QEMU is a generic and open source machine emulator and virtualizer.
Prerequisites
You have to enable virtualization options in your UEFI or BIOS settings. There should be an option called either VT-x for Intel or AMD-V. To check if virtualization is enabled and available type:
1
2
3
grep --color vmx /proc/cpuinfo     # Intel
grep --color svm /proc/cpuinfo     # AMD
lscpu | grep Virt
Output of lscpu:
1
Virtualization:        VT-x
If enabled put yourself to the kvm group.
1
usermod -aG kvm ${USER}
Installation
1
pacman -S qemu-desktop libvirt virt-manager ed2k-ovmf nftables bridge-utils dnsmasq
| package | description |
|---|---|
| qemu-desktop | Standard meta package for QEMU itself. |
| libvirt | API for controlling virtualization engines (openvz,kvm,qemu,virtualbox,xen,etc) |
| virt-manager | Graphical User-Interface |
| ed2k-ovmf | (UEFI-)Firmware for Virtual Machines (x86_64, i686) |
| bridge-utils | Utilities for configuring the Linux ethernet bridge |
Configuration
The following configuration files should be edited before starting the virtualization services.
Edit /etc/libvirt/qemu.conf and search for #user =.
1
2
3
4
5
[...]
#user = "libvirt-qemu"
[...]
#group = "libvirt-qemu"
[...]
You can either add your user to the
libvirt-qemugroup or set your username inqemu.conf.
Edit /etc/libivrt/libvirtd.conf and seach for unix_sock_group =.
1
2
3
[...]
#unix_sock_group = "libvirt"
[...]
You can either add your user to the
libvirtgroup or set your username inlibvirtd.conf. As for your user also exists a group. On Debian systems there would be group calleduserswho you would belong to.
When finished start and enable libvirtd.service for next reboot.
1
systemctl enable libvirtd.service --now
It should also start and enable more services like networking.
Usage
When starting Virt-Manager it should look like: 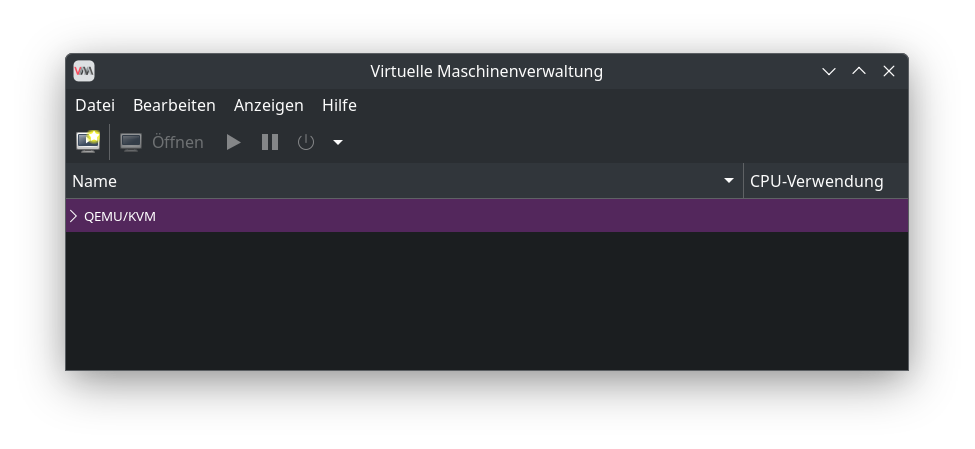
Default NAT network
Every standard libvirt installation provides NAT based connectivity to virtual machines out of the box. This is the so called ‘default virtual network’. You can verify that it is available with
1
2
3
4
virsh net-list --all
Name                 State      Autostart
-----------------------------------------
default              active     yes
If it is missing, then the example XML config can be reloaded & activated
1
2
3
virsh net-define /usr/share/libvirt/networks/default.xml
virsh net-autostart default
virsh net-start default
When the libvirt default network is running, you will see an isolated bridge device. This device explicitly does NOT have any physical interfaces added, since it uses NAT + forwarding to connect to outside world. Do not add interfaces!
1
2
3
brctl show
bridge name bridge id       STP enabled interfaces
virbr0      8000.000000000000   yes
Libvirt will add iptables rules to allow traffic to/from guests attached to the virbr0 device in the INPUT, FORWARD, OUTPUT and POSTROUTING chains. It will also attempt to enable ip_forward. Some other applications may disable it, so the best option is to add the following to /etc/sysctl.conf
1
net.ipv4.ip_forward = 1
Virtio guest tools
Download the latest drivers from Fedora server: https://fedorapeople.org/groups/virt/virtio-win/direct-downloads/. Choose the iso-image.
Mount it as CD-ROM to your VM and install it.
Shared folders on Windows guests
Open VM settings:
- Check
Enable shared memoryunder Memory - Click
Add hardwareat the bottom. - Select
Filesystemfrom the left panel in the add new hardware window - Select
Driver=virtiofsin the details tab. - Click on
browseand select the host path from your Linux system. - In the target path, mention any name you want. It’s just a file tag which will be used during mount.
- Click
Apply
Download WinFSP and install it on the Windows guest. It is system software that provides runtime and development support for custom file systems on Windows computers. In this sense it is similar to FUSE (Filesystem in Userspace), which provides the same functionality on UNIX-like computers. You also can use winget in PowerShell.
On Windows 10 it is not pre-installed and you have your system up-to-date. Then
wingetis there and works.
1
winget install WinFsp.WinFsp
Check for the service to autostarted
1
Get-Service -Name "VirtioFsSvc" | Select-Object Name, DisplayName, Status, StartType
1
2
3
Name        DisplayName        Status StartType
----        -----------        ------ ---------
VirtioFsSvc VirtIO-FS Service Stopped    Manual
Set the service’s StartType to automatic. Run Powershell as administrator.
1
Set-Service -Name "VirtioFsSvc" -StartupType Automatic
Start the service.
1
Start-Service -Name "VirtioFsSvc"
Or
- Open the start menu and search for “Services”.
- Scroll down to find out the “VirtIO-FS Service”.
- Right-click and hit Start to start the service.
- (Optional) If you want to start the service each time you boot Windows guest, then set VirtIO-Sevice-FS > Properties > Startup type > Manual to Automatic
Converting from VirtualBox
I want to show you an easy way to convert VirtualBox VMs to QEMU.
Understand that for the conversion of an Open Virtualization Format (OVF) package’s virtual disk to the QCOW2 format the manifest file (.mf) is not strictly necessary. The conversion process focuses on the data structure of the disk image itself and does not require the checksums or other metadata provided by the manifest file.
Consider that OVF Version 1.0 is absolutly recommended for its balance between compatibility with conversion tools and support for a broad range of virtualization features.
Export your VM to Open Virtual Appliance (OVA) in OVF 1.0
1
2
VBoxManage list vms # List all VMs
VBoxManage export your_virtual_machine_name -o your_virtual_machine.ova --ovf10 # export to ovf 1.0
Extracting the contents of your_virtual_machine.ova
1
tar -xvf your_virtual_machine.ova
Convert the vmdk-file to qcow2
1
qemu-img convert -f vmdk -O qcow2 your_virtual_machine-disk001.vmdk destination_image.qcow2
You can use this qcow2-drive to re-create your VM in QEMU or virt-manager.
Mounting qcow2 images
A dynamic QCOW2 image can no longer simply be mounted in the system. Instead, you can take a detour via NBD (Network Block Device). This starts and mounts the desired image as a Network Block Device.
Enable kernel module
1
modprobe nbd
Connect qcow2 image to nbd
1
qemu-nbd --connect=/dev/nbdX target.qcow2
| parameter | description |
|---|---|
| -c / –connect | Connect to specific NBD |
| -d / –disconnect | Disconnect specific NBD |
Mounting
1
fdisk -l /dev/nbd0
1
mount /dev/nbdX /mnt